新站第一章:用任意绑定于cloudflare制作免费企业邮箱(可收发)
KImi的在创业或个人项目中,拥有一个专业的企业邮箱不仅能提升品牌形象,还能提高沟通效率。然而,传统的企业邮箱服务往往价格昂贵,对于预算有限的个人和初创团队来说并不友好。好消息是,借助Cloudflare和一些开源工具,我们可以轻松搭建一个免费且功能强大的企业邮箱系统。今天,我将带你一步步实现这一目标。
企业邮箱的优势:
提升专业形象:使用企业邮箱(如[email protected])可以让你在客户眼中显得更专业、更可信。
集中管理:方便团队协作,所有邮件都集中在一个域名下,便于分类和管理。
安全性更高:企业邮箱通常提供更高级的安全防护,保护你的商业机密。
传统企业邮箱的痛点:
成本高昂:大多数企业邮箱服务需要付费,对于预算有限的个人或初创团队来说是一笔不小的开支。
技术门槛高:搭建和维护企业邮箱需要一定的技术知识,对于非技术背景的用户来说难度较大。
Cloudflare简介:
Cloudflare是一家提供CDN(内容分发网络)、安全防护和DNS服务的公司。通过其全球分布的服务器网络,Cloudflare可以加速网站加载速度、保护网站免受攻击,并提供免费的SSL证书。
Cloudflare的免费功能:
免费DNS解析:可以将域名解析到任意服务器。
免费SSL证书:确保网站通信的安全。
强大的安全防护:防止DDoS攻击、恶意爬虫等。
Cloudflare在企业邮箱搭建中的作用:
通过Cloudflare的DNS解析功能,我们可以将域名绑定到第三方邮箱服务,从而实现免费企业邮箱的搭建。
1.注册Cloudflare账号并添加域名
这里不过多赘述,网上教程很多。
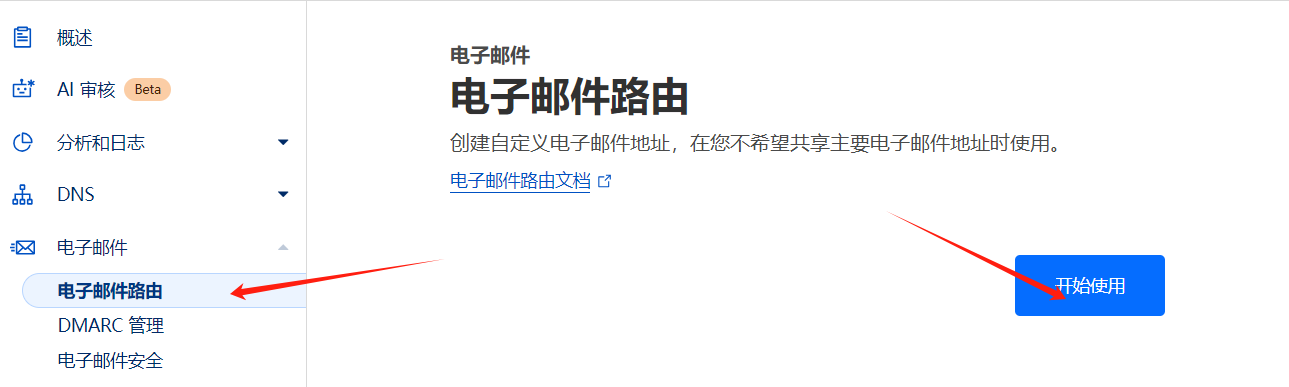
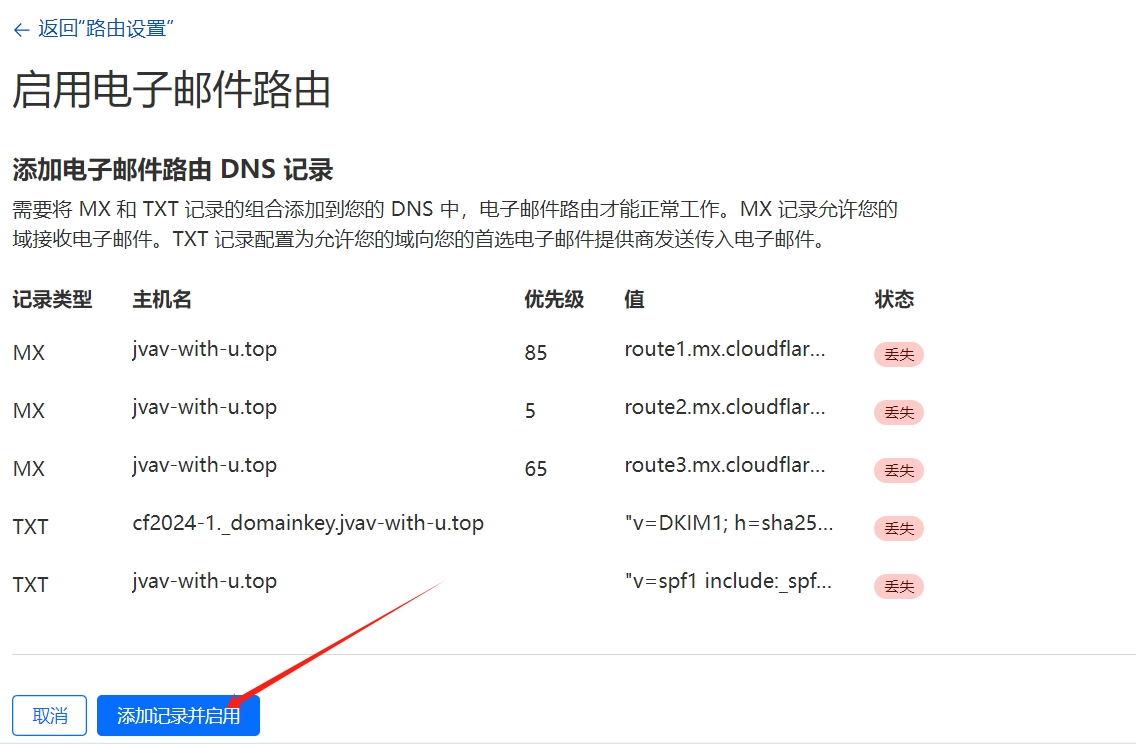
2.设置收邮件
在dashboard打开域名控制台,并选择电子邮件进行如下操作
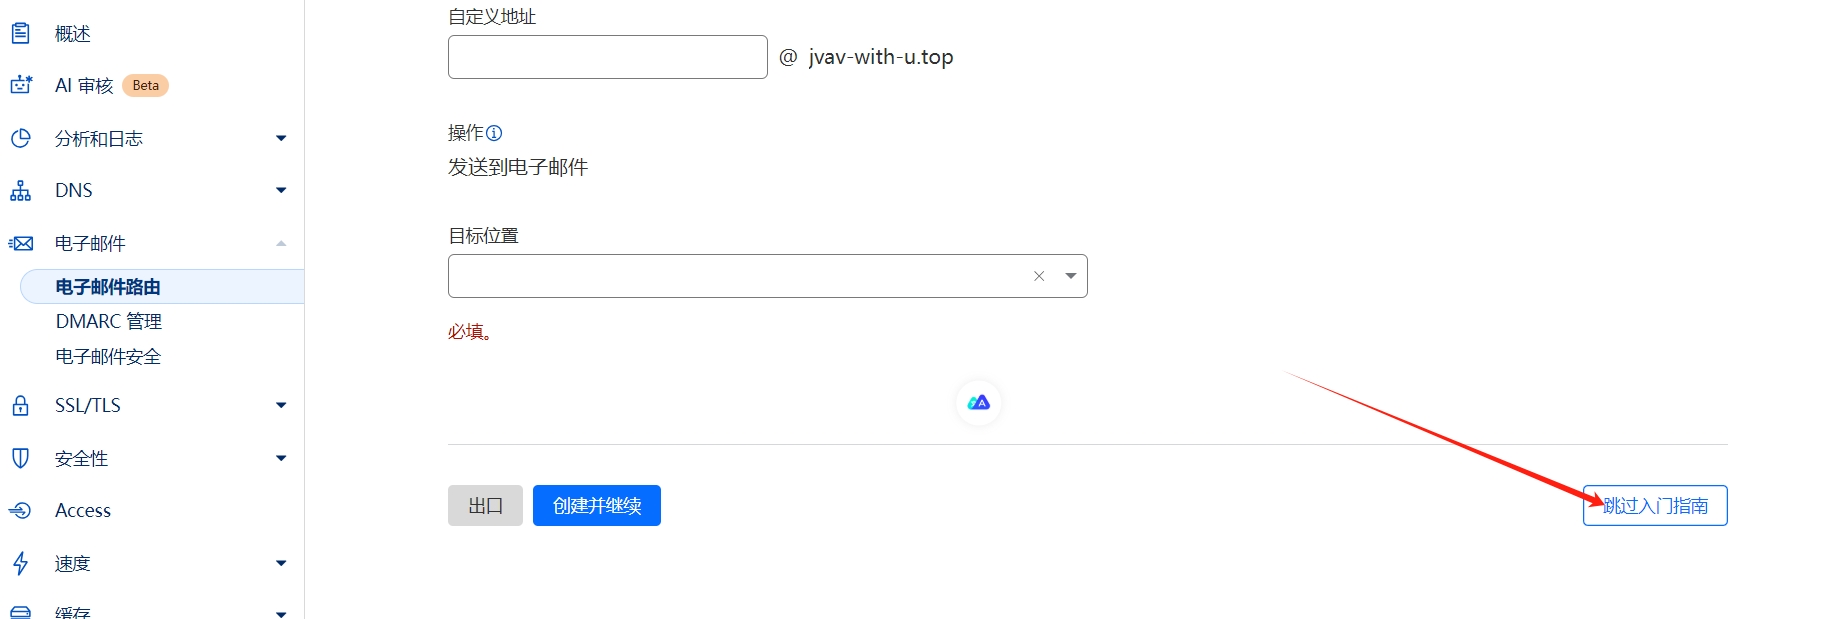
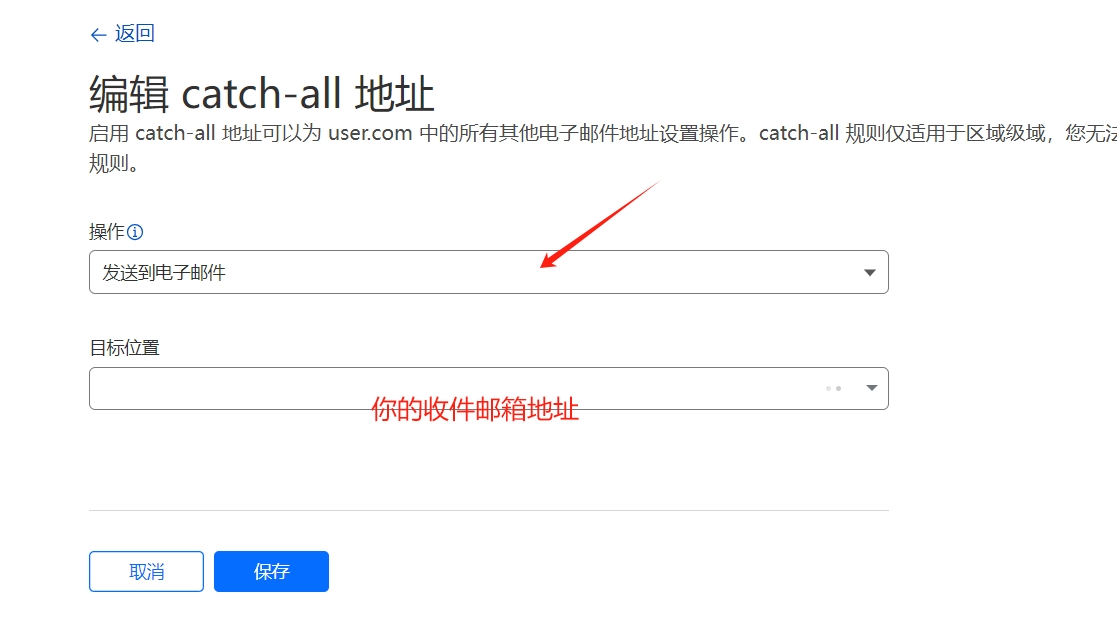
这里什么都不填,直接点这里:
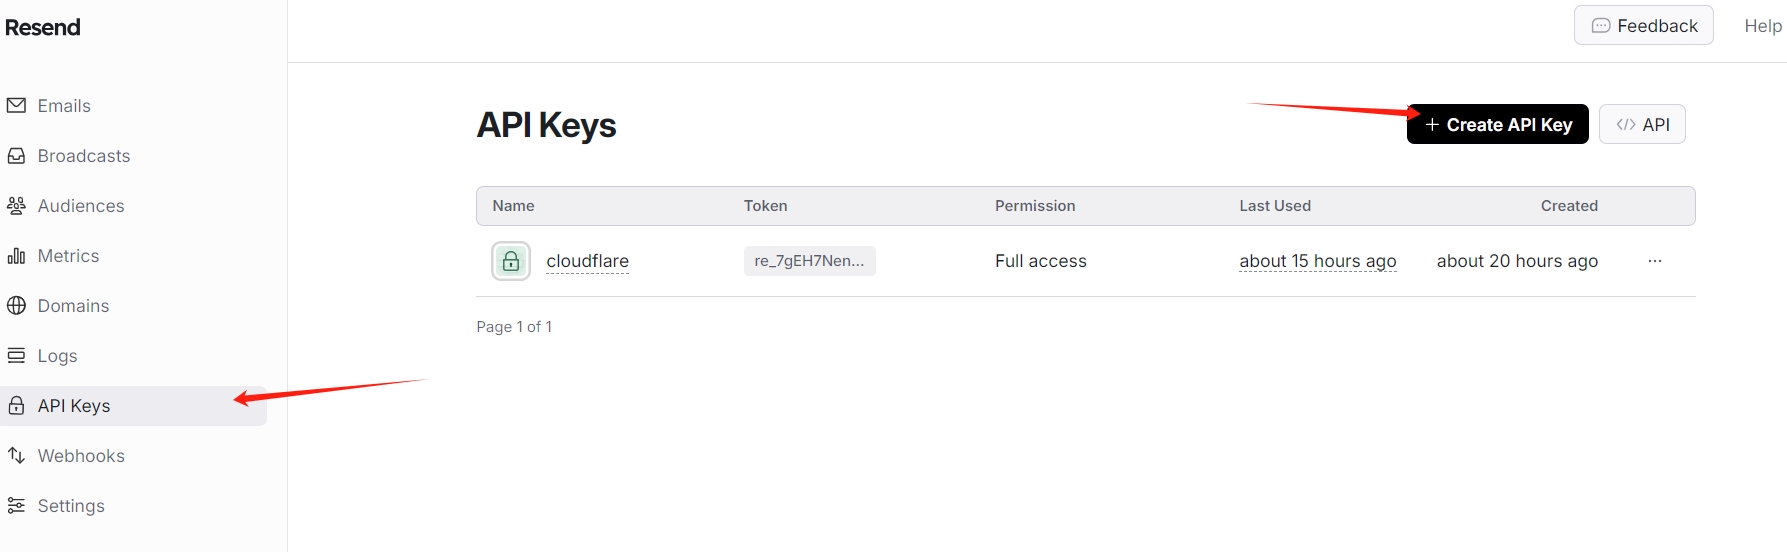
3.获取resendAPIkey与配置
进到resend.com注册后这样操作
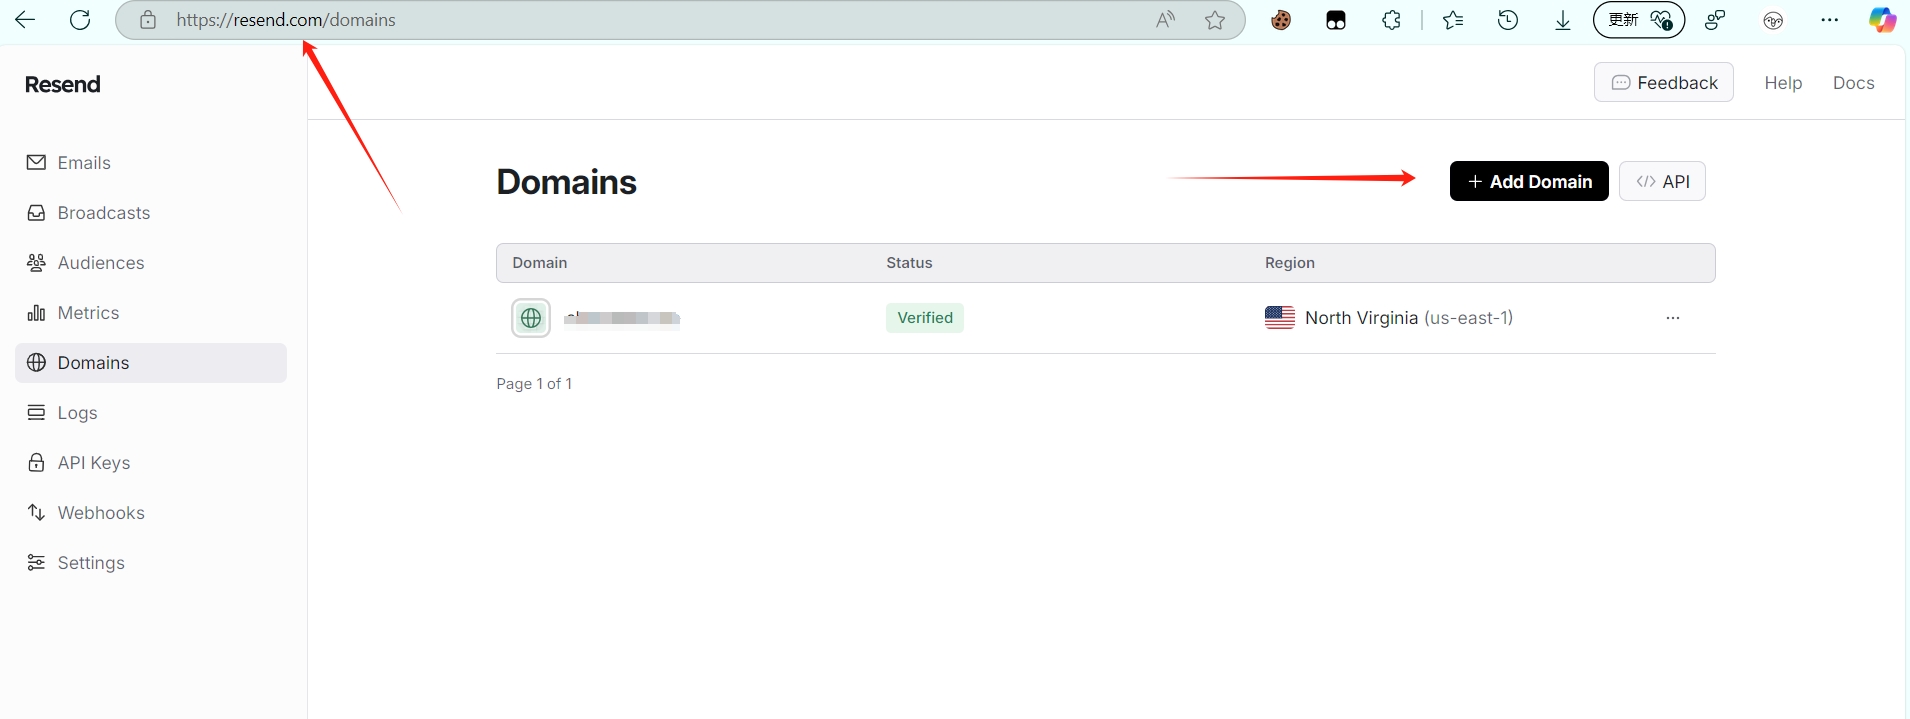
这里填入你的域名再点add
再按照他的设置配置好cloudflare的dns,网上也有很多教程
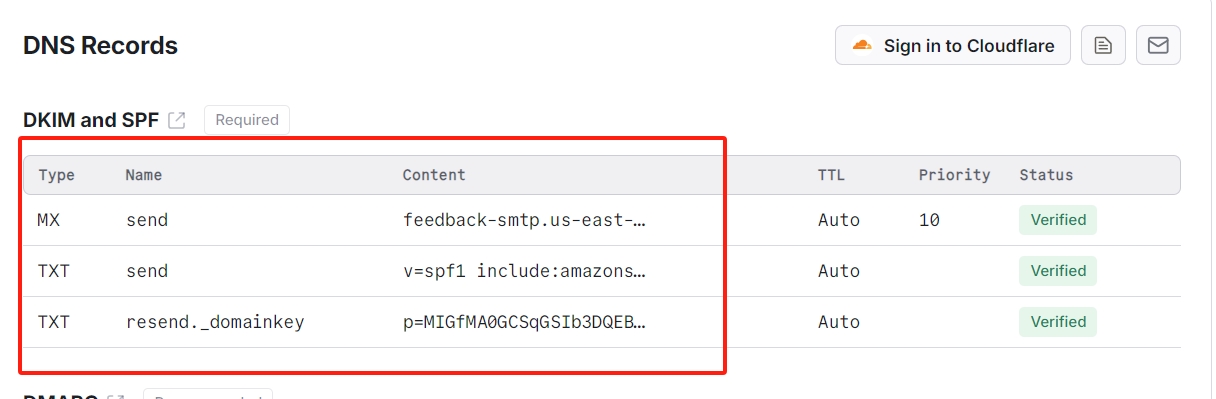
配置好后点击上面的verify就行了
然后点击api-key,生成后保存好
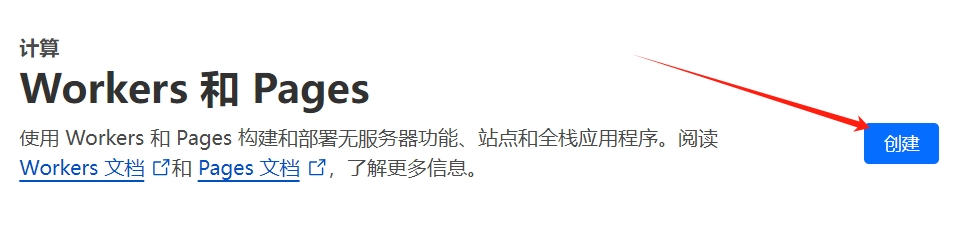
4.设置发件worker
回到dashboard

现在左侧会有一个代码框
删除原来的并把此代码填入:
addEventListener('fetch', event => {
event.respondWith(handleRequest(event.request));
})
async function handleRequest(request) {
if (request.method === 'POST') {
const { senderName, username, to, subject, html } = await request.json();
// 固定的 API 密钥
const apiKey = '<你的密钥>';
// 构建发件人邮箱
const fromEmail = `${username}@<你的域名>`;
const requestBody = {
from: `${senderName} <${fromEmail}>`, // 设置显示的发件人名称
to: [to],
subject: subject,
html: html
};
const response = await fetch('https://api.resend.com/emails', {
method: 'POST',
headers: {
'Authorization': `Bearer ${apiKey}`,
'Content-Type': 'application/json'
},
body: JSON.stringify(requestBody)
});
const data = await response.json();
if (data.success) {
return new Response(JSON.stringify({ message: '邮件发送成功!' }), { status: 200 });
} else {
return new Response(JSON.stringify({ error: `邮件发送失败: ${data.error}` }), { status: 400 });
}
} else {
// 返回 HTML 表单页面
return new Response(`
<!DOCTYPE html>
<html lang="en">
<head>
<meta charset="UTF-8">
<meta name="viewport" content="width=device-width, initial-scale=1.0">
<title>Send Email via Resend API</title>
<style>
body { font-family: 'Arial', sans-serif; background-color: #f4f7fc; margin: 0; padding: 0; display: flex; justify-content: center; align-items: center; height: 100vh; }
.container { background-color: #fff; border-radius: 8px; box-shadow: 0 4px 8px rgba(0, 0, 0, 0.1); width: 400px; padding: 30px; }
h1 { text-align: center; color: #333; font-size: 24px; margin-bottom: 20px; }
label { display: block; font-size: 14px; margin-bottom: 6px; color: #555; }
input[type="email"], input[type="text"], textarea { width: 100%; padding: 10px; margin-bottom: 16px; border: 1px solid #ddd; border-radius: 4px; font-size: 14px; color: #333; }
textarea { height: 120px; resize: vertical; }
button { width: 100%; padding: 12px; background-color: #5c6bc0; color: #fff; border: none; border-radius: 4px; font-size: 16px; cursor: pointer; transition: background-color 0.3s; }
button:hover { background-color: #3f4a90; }
.success-message, .error-message { text-align: center; font-weight: bold; margin-top: 20px; }
.success-message { color: #4caf50; }
.error-message { color: #f44336; }
.form-group { margin-bottom: 16px; }
</style>
</head>
<body>
<div class="container">
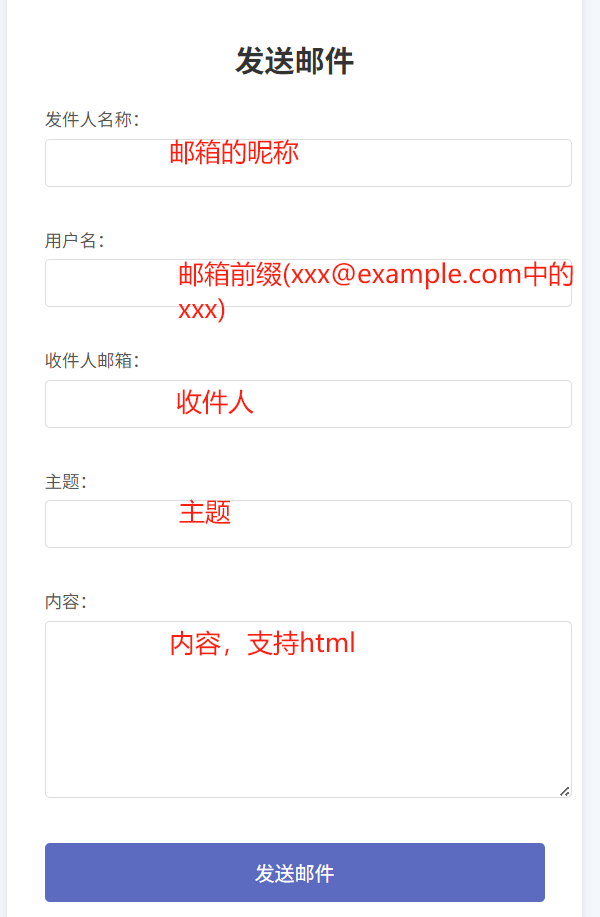
<h1>发送邮件</h1>
<form id="emailForm">
<div class="form-group">
<label for="senderName">发件人名称:</label>
<input type="text" id="senderName" required>
</div>
<div class="form-group">
<label for="username">用户名:</label>
<input type="text" id="username" required>
</div>
<div class="form-group">
<label for="toEmail">收件人邮箱:</label>
<input type="email" id="toEmail" required>
</div>
<div class="form-group">
<label for="subject">主题:</label>
<input type="text" id="subject" required>
</div>
<div class="form-group">
<label for="htmlContent">内容:</label>
<textarea id="htmlContent" required></textarea>
</div>
<button type="submit">发送邮件</button>
</form>
<div id="message"></div>
</div>
<script>
document.getElementById('emailForm').addEventListener('submit', async function(event) {
event.preventDefault();
const senderName = document.getElementById('senderName').value;
const username = document.getElementById('username').value;
const toEmail = document.getElementById('toEmail').value;
const subject = document.getElementById('subject').value;
const htmlContent = document.getElementById('htmlContent').value;
const response = await fetch('/', {
method: 'POST',
headers: {
'Content-Type': 'application/json'
},
body: JSON.stringify({ senderName, username, to: toEmail, subject, html: htmlContent })
});
const data = await response.json();
const messageDiv = document.getElementById('message');
if (response.ok) {
messageDiv.innerHTML = '<div class="success-message">' + data.message + '</div>';
} else {
messageDiv.innerHTML = '<div class="error-message">' + data.error + '</div>';
}
});
</script>
</body>
</html>
`, { headers: { "Content-Type": "text/html" } });
}
}
紧接着修改一下11行和13行的apikey和域名,点击部署
这个可能有泄露风险
欢迎大佬指点
点击访问
发送后错误信息如果是undefine就算成功了!!!
完成